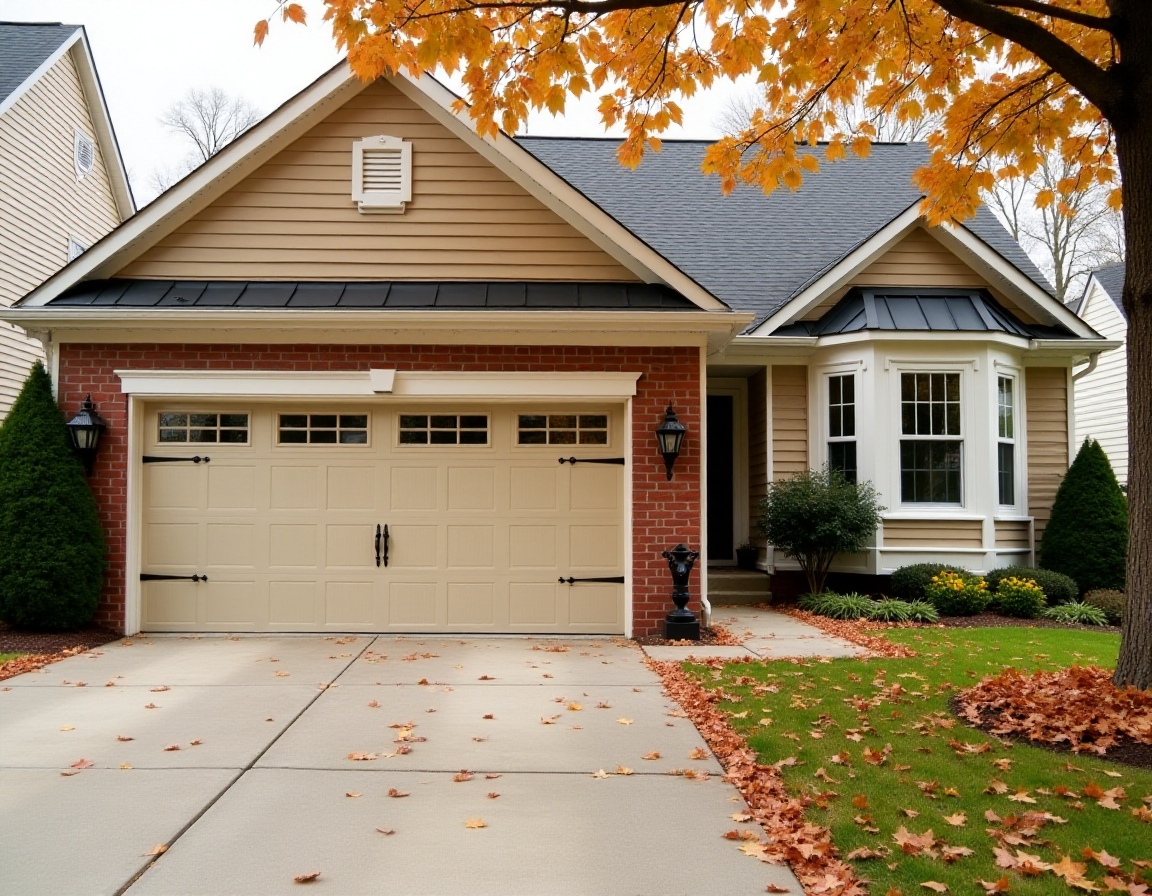
Ways to Weatherproof a Garage Door (Seal Drafts, Block Water, Keep Pests Out)
.jpg)
A garage door is like a giant moving wall, and even small gaps act like an open window. That’s why you feel cold drafts near the floor, find a thin line of water after a storm, or spot leaves and bugs sneaking in around the corners. If your garage shares a wall with your house, those leaks can also push up heating and cooling costs.
The good news is weatherproofing a garage door usually comes down to simple steps you can handle in an afternoon. The big idea is to close the gaps at the bottom, sides, and top, then add insulation for better temperature control. One more thing matters: fix basic door issues first, because even the best seals won’t work if the door doesn’t close square.
Start with a quick inspection to find gaps, leaks, and wear
Weatherproofing works best when you know exactly where air and water are getting in. A quick inspection helps you spend money in the right places, instead of buying a seal that never had a chance.
Here’s what you’re checking for, and what “good” looks like:
- Bottom edge: The seal should touch the floor along the full width. “Good” means no visible light under the door and no hard gaps you can slide a finger through.
- Side jambs: The door should press evenly against weatherstripping from bottom to top. “Good” means no fluttering strip, no daylight at the corners.
- Top header: This is a sneaky leak spot, especially if the door is slightly out of level. “Good” means the top seal compresses lightly across the full width.
- Seal condition: Rubber should feel flexible, not cracked, shiny, or brittle. Vinyl should not be shrunken or pulled away at the ends.
- Floor shape: Look for low spots where water pools near the door. A perfect bottom seal still struggles on uneven concrete.
If you find multiple issues, don’t get discouraged. Most garages have more than one leak point, and each improvement stacks.
How to spot air leaks, water entry, and weak spots in 10 minutes
Start with the door closed and the lights off inside the garage. Walk the perimeter and look for daylight. Even a thin line matters, because air moves fast through long, narrow gaps.
Next, run the back of your hand along the edges, especially the bottom corners. Your skin will feel drafts better than your palm. If you want a clearer test, light an incense stick and hold it near the sides and top. If the smoke pulls sideways, you’ve got an air leak.
Then check for water clues:
- Stains or grime trails on the inside bottom edge
- Rust on the lower corners of steel doors
- Swollen wood on wood doors
- Dampness or silt lines on the floor after rain
Measure what you can. A tape measure helps you judge where you’re fighting a losing battle. For tight weathersealing, aim for gaps under about 1/8 inch where possible. Larger gaps can still be sealed, but you may need thicker weatherstripping, a threshold, or a door adjustment.
Before you install anything new, plan to clean first. Dirt, old adhesive, and gritty concrete keep seals from sticking and make them wear out faster.
Fix door problems first so seals actually work
Weatherstripping isn’t a cure for a door that doesn’t close right. Take a few minutes for these quick wins:
Tighten loose hardware: Hinges and roller brackets can loosen over time. Snug screws and lag bolts, and replace stripped screws with longer ones (or use a repair kit if needed).
Check rollers and track: Bent track or worn rollers can cause the door to sit crooked, leaving a corner gap. Rollers should roll, not grind. Tracks should be secure and aligned.
Clean the bottom edge: If the door’s bottom retainer is packed with mud or old rubber bits, a new seal won’t sit flat. Wipe it down and scrape out debris.
Know when to stop and call a pro. If the door is out of square, panels are bent, wood is warped, or the gap changes a lot as the door moves, weatherproofing won’t hold. A basic adjustment can save money long term, because it prevents you from replacing seals over and over.
Seal the bottom of the garage door to stop drafts, water, and pests
If you only do one thing, seal the bottom. This is usually the biggest leak point because wind pushes under the door, water runs downhill, and tiny pests only need a small opening.
There are two main tools here:
- A bottom seal attached to the door (it compresses against the floor)
- A threshold seal attached to the floor (it creates a raised barrier)
In many garages, the best result comes from using both, especially if you get wind-driven rain or melting snow that likes to creep inside.
Choose the right bottom seal: T-end, bulb, bead, or brush
Bottom seals come in different shapes, and the “right” one depends on two things: your door’s retainer track and how even your floor is.
T-end (T-style): This is one of the most common. The seal has a T-shaped edge that slides into a matching track on the bottom of the door. It’s a solid pick for steel and aluminum doors with fairly even floors.
Bulb (U-style or bulb): This has a tube-like “bulb” that compresses well. It’s forgiving on rough or slightly uneven concrete and helps in heavy rain or snow because it maintains contact.
Bead: This style uses rounded beads that fit into a double-track retainer. It’s durable and can handle frequent door use. It’s also common on heavier-duty doors.
Brush: Brush seals sweep out dust and small debris. They’re useful where leaves and grit build up near the opening, but they don’t block air as tightly as rubber or silicone. Many homeowners pair a brush with other sealing methods.
Material matters too, especially in January cold snaps or summer heat. Here’s a quick guide you can screenshot before a store run:
| Material | What it’s good at | Watch out for | Best fit |
|---|---|---|---|
| Rubber | Flexible seal on normal floors | Can crack in extreme cold over time | Mild to moderate climates |
| Vinyl (PVC) | Low cost, resists moisture and UV | Can get brittle in cold, may shrink | Warm, sunny, humid areas |
| Silicone | Stays flexible in hot and cold, long life | Higher cost | Extreme cold or heat |
Installation basics are simple, but don’t skip the prep.
- Confirm the retainer shape (T-channel, J-channel, U-channel, double-track). If the seal profile doesn’t match, it won’t fit.
- Remove the old seal and clean the track or bottom edge.
- Lubricate lightly if needed to slide the new seal into the track (avoid sticky products that attract grit).
- Cut straight and square, then check both corners for full contact when the door closes.
What to buy for most DIY garage door weatherproofing jobs:
- Bottom seal that matches your retainer style (measure door width first)
- Utility knife or heavy scissors (depending on seal material)
- Tape measure and marker
- Cleaner and rags (plus a scraper if old adhesive is present)
If you’ve been fighting puddles, keep reading. That’s where a threshold earns its keep.
Add a garage door threshold seal when the floor is uneven or water pools
A garage door threshold seal is a rubber strip glued to the floor right under the door’s closing line. Many have a raised center ridge that acts like a speed bump for water. It’s a smart fix for wind-driven rain, melting snow, and small pests that hug the ground.
A threshold is also the best answer when the concrete isn’t flat. If your floor dips in the middle or slopes toward the driveway, a door-mounted seal can only do so much.
Basic install notes that prevent headaches:
Clean and dry the concrete: Adhesive needs a clean surface. Sweep, scrub, and let it dry fully. If you glue to dusty concrete, it will peel.
Test door clearance: Dry-fit the threshold first. Close the door gently and make sure it compresses without stopping the door short.
Use the right adhesive: Most threshold kits use a heavy-duty adhesive meant for concrete and rubber. Follow cure times, and keep cars off it until it sets.
For best results, pair the threshold with a fresh bottom seal. Think of it like closing a ziplock bag. One side helps, both sides work better.
Weatherstrip the sides and top for a tighter, quieter close
Once the bottom is sealed, the next biggest leaks usually show up at the side jambs and the top header. These gaps let in dust, cold air, and that whistling sound on windy nights. They also invite spiders and bugs that only need a thin entry point.
The goal here is simple: the door should press against weatherstripping evenly when closed, without needing extra force to latch.
Side and top weatherstripping options: jamb seals, PVC blade seals, and brush seals
Most homes do well with jamb weatherstripping, mounted to the garage door frame (not the door). When the door closes, the strip presses against the door edge.
Common options:
Vinyl or rubber jamb seals: The standard choice for most garages. They’re affordable, easy to cut, and create a consistent seal when installed with light compression.
PVC blade seals: These have a flexible “blade” that bends against the door. They’re neat-looking and can work well when the door closes evenly.
Brush seals: Helpful where the framing is a bit uneven, or where you want a quieter close with less rubbing. They’re also good in dusty areas, but they don’t block air as tightly as a solid rubber contact.
Installation overview:
- Clean the frame so the strip sits flat.
- Cut carefully for clean corners, and leave enough length to meet tight at the top.
- Fasten according to the product (nails, screws, or adhesive backing).
- Close the door and check for even contact along the full height.
If your winters swing between cold and mild, consider materials that stay flexible across temperature changes. Stiff stripping can pull away and create corner gaps.
Avoid common mistakes that cause gaps at the corners and top header
Most “weatherstripping didn’t work” stories come down to a few avoidable errors.
- Installing it too tight: If the strip is crushed hard, the door may not close fully, or it may reverse on an opener. You want light, even compression.
- Installing it too loose: If you can see daylight at the corners, it’s not doing its job.
- Missing corner gaps: The bottom corners and top corners need special attention. Cut clean joints so strips meet without leaving a triangle-shaped opening.
- Fastening into weak wood: If the jamb is cracked or soft, nails won’t hold. Repair the frame first or use appropriate anchors.
- Ignoring a sagging door: If the door is tilted, the top seal often fails first. Fix alignment before chasing seals.
A simple method helps: position the weatherstrip with the door closed, then fasten it. After install, open and close the door a few times, then re-check contact.
Add insulation and keep up with maintenance for long-term results
Seals stop air and water movement. Insulation slows heat flow through the door itself. Do both and the garage feels less like a walk-in freezer in winter and less like an oven in summer.
If you use your garage as a workshop, gym, laundry area, or entry into the house, insulation pays off in comfort fast.
Garage door insulation options: foam panels, reflective kits, and insulated doors
You have three paths, depending on your budget and how long you plan to keep the door.
Rigid foam panels (DIY favorite): Foam board can deliver about R-5 per inch as a rough rule of thumb, depending on the type. Panels cut to fit inside door sections can reduce temperature swings and help quiet the door. Keep cuts clean and don’t cover hinges, rollers, or moving joints.
Reflective insulation kits: These are quick to install and work best in mild climates or garages that bake in the sun. They help reflect radiant heat, but they’re not a full substitute for thicker foam in cold regions.
Replace with an insulated door: If your door is old, dented, or already struggling to seal, a new insulated model can be the cleanest solution. It also avoids overloading the door with added weight.
Safety note: Don’t add so much weight that the door feels heavy or unbalanced. If the door won’t stay halfway open on its own, the spring system may need adjustment by a pro.
Seasonal maintenance checklist so your seals last longer
Seals fail faster when they’re dirty, dry, or crushed under debris. A small routine keeps them working.
Twice a year (fall and spring):
- Wash seals with mild soap and water, then rinse.
- Inspect for cracks, shrinkage, or brittle spots, replace damaged sections.
- Lubricate rollers and hinges lightly, keep lubricant off the rubber when possible.
- Clear gravel, leaves, and ice-prone buildup near the door line.
- Trim plants back so they don’t push debris against the threshold.
- Re-check for drafts before winter and after big storms.
If your climate has extreme temperature swings, look for seals marketed as cold-flex rubber or dual-hardness PVC. They tend to hold shape better when the weather turns harsh.
Conclusion
Weatherproofing a garage door doesn’t need to be complicated. Start by inspecting for daylight, drafts, and water marks, then fix any door alignment or hardware issues so seals can do their job. Next, seal the bottom with the right profile, add a threshold if the floor is uneven or water pools, then weatherstrip the sides and top for a tighter close. Finish by adding insulation and sticking to simple maintenance so your work lasts.
Done right, weatherproofing means less draft, less water, fewer pests, a quieter garage, and less strain on your heating and cooling. Pick one upgrade you can do today, and if the door is warped or gaps are large and shifting, book a pro adjustment so your seals finally stay sealed.
About Aubrey Love
Aubrey is a web developer, author, and blogger with over 15 years of experience in web development and 10 years as a blogger. He specializes in responsive and interactive web pages, databases (SQL Server), and professional writing. He has a B.E.E. degree in Electrical Engineering and holds several certificates in SQL Server Database Administration, HTML, CSS, JavaScript, and tech writing.